How to Refinish a Pool Cue
An old cue with a scratched, sticky, or cloudy butt does not have to stay that way. Refinishing a cue is a satisfying weekend project, and done carefully it can make a beat-up house cue or a garage-sale find look and feel close to new. The catch is that a cue is two very different pieces of wood: the butt wants a protective finish, and the shaft absolutely does not. Get that distinction right and the rest is mostly patience and sandpaper.
Strip and sand the butt
Start by protecting everything you are not refinishing. Tape off the wrap, the joint, and the bumper with painters tape, and take real care around decals and inlays, which sand through in seconds. If the old finish is thick or flaking, a citrus-based stripper speeds things up; otherwise sanding alone does the job.
A workable grit schedule looks like this: 220 to cut the old finish and level dings, 320 to erase the 220 scratches, then 400 and 600 to leave the bare wood uniformly smooth. Sand along the length of the cue, keep the cue rotating so you do not flatten one side, and stop often to look at the wood under raking light. Any scratch you can see now will be magnified under new finish.
Choosing a finish: wax, oil, or lacquer
Three honest options, three different characters. A hard finish such as lacquer or a wipe-on polyurethane gives the glossy, durable, factory look and the best protection against dings and moisture; apply several thin coats, scuff lightly with 600 grit or finer between coats, and let each coat fully dry. An oil finish like a Danish oil leaves a warmer, more natural feel with a satin look, and it is very forgiving to apply, though it protects less. Plain carnauba or cue wax is the minimalist route, fine over an existing sealed surface or on a player who rewaxes regularly.
Whatever you pick, thin coats win. A cue is handled constantly, and thick gloppy finish shows every sag and fingerprint. After the final coat cures for a few days, polish with micro mesh pads up through the ultra-fine grits for a deep, even sheen.
The shaft is a different animal
Here is the rule that separates good refinish jobs from ruined cues: never put a thick film finish on a shaft. A lacquered shaft feels sticky and squeaky sliding through your bridge fingers, which is the opposite of what you want. Shafts should be cleaned, lightly smoothed, and sealed thin.
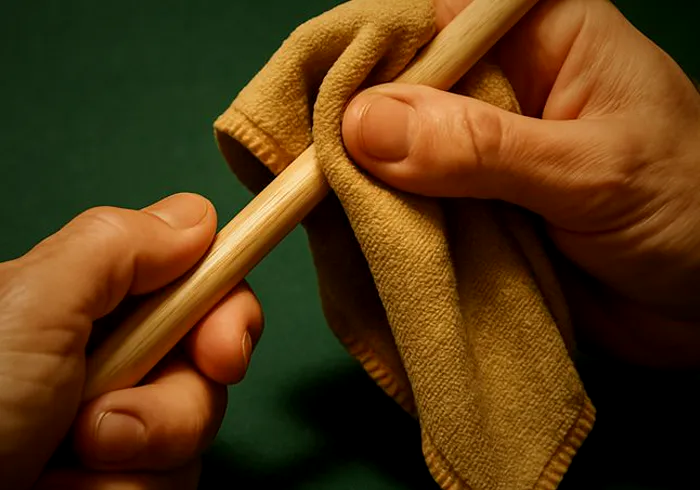
Clean the shaft with a purpose-made shaft cleaner or a barely damp magic-eraser pass, then smooth with very fine paper, 600 up through micro mesh, using a light touch so you do not change the taper. Finish by burnishing, rubbing briskly with a leather pad or even a piece of brown paper bag until the wood warms and the pores close, then apply a thin shaft wax or sealer and burnish again. The result is a glassy, fast shaft with no coating to peel or drag.
Protecting decals, rings and inlays
Most production cues carry their graphics as decals under the clear coat, and those decals do not survive aggressive sanding. If you want to keep them, sand around them by hand with fine grit only enough to scuff the old clear, then let the new finish lock them back down. Real inlays in a better cue are more forgiving, but sharp corners of pearl or exotic wood can catch paper and lift, so hand-sand those areas gently and skip power tools entirely. When in doubt, tape it off and blend later. A slightly visible transition line beats a destroyed logo every time.
When to send it to a pro instead
A cue repair shop with a lathe can spin the cue for perfectly even sanding and finish application, which is how you get a truly flawless gloss. Lathe refinishing typically costs $75 to $150, and it is the right call for cues with real value, warped finish problems, loose joints, or structural work needed at the same time. Refinish a $60 house cue yourself and learn on it; think twice before free-handing a vintage Meucci. And remember that refinishing a collectible cue can lower its value to collectors, exactly as it does with antique furniture, so leave rare cues original unless they are already too rough to save, and get an opinion from a knowledgeable dealer first if you are not sure what you have.
Our picks
Links open the current selection and price on Amazon so you can compare real reviews before buying.
Micro Mesh Sanding Pad Set
Fine sanding and polishingGraduated ultra-fine pads take a butt finish from scuffed to mirror gloss and smooth a shaft without eating into the taper.
Check price on AmazonCue Shaft Wax and Sealer
Slick shaft finishA thin burnish-in wax seals shaft wood against moisture and hand oil while keeping the glassy feel a coated finish ruins.
Check price on AmazonPainters Tape and Tack Cloth
Masking and dust removalClean tape lines protect the wrap and joint, and a tack cloth pulls sanding dust off before each coat so the finish lays glass-flat.
Check price on AmazonFrequently asked questions
What grit sandpaper should I use on a pool cue?
Start no coarser than 220 on the butt to remove old finish, then step through 320, 400, and 600 before finishing. On the shaft stay at 600 and finer, using micro mesh for the final passes, because coarse paper changes the taper faster than you think.
Can I refinish a cue without taking it apart?
Yes. Tape off the wrap, joint collars, and bumper carefully and work around them. Full disassembly gives cleaner results at the wrap edges, but bumpers and wraps are not designed for casual removal, so masking is the safer route for most owners.
How long does a cue refinish take?
Plan on a weekend of actual work spread over a week of waiting. Sanding takes an afternoon, but each finish coat needs to dry, multiple coats are mandatory, and the final cure before hard polishing is best given several days.
Related guides
LeaguePool is reader-supported. When you buy through links on this site we may earn an affiliate commission at no extra cost to you. As an Amazon Associate we earn from qualifying purchases.